WordPress Security Plugin
AMWScan Antimalware Scanner lets WordPress administrators run and review AMWScan checks without leaving the dashboard. It stores reports, backups, quarantine, and scan state outside the scanned directory.
Choose an edition
| Edition | Download | Browser file editor | Restore quarantined files |
|---|---|---|---|
| AMWScan Antimalware Scanner Lite | WordPress.org | No | No |
| AMWScan Antimalware Scanner | GitHub / amwscan-X.Y.Z.zip | Yes | Yes |
Lite is a separate Store-safe package: full-only code is absent from the archive, not merely disabled. Both editions use the amwscan directory, text domain, settings, and data, and therefore cannot be active together. Deactivate and remove the installed edition before switching.
Install and activate
- Install Lite from the WordPress.org plugin page, or download the latest full WordPress plugin release from GitHub.
- In WordPress, open Plugins > Add New to install Lite, or choose Upload Plugin to upload a release ZIP. You can also copy release contents to
wp-content/plugins/amwscan. - Activate AMWScan Antimalware Scanner.
- Open Antimalware > Settings to confirm the scan target and policy.
The plugin requires PHP 7.4 or newer. Enable the PHP zip extension to inspect archives and restore trusted WordPress core files.
Run your first scan
Open Antimalware and select Run scan now. Scans run in the background through WP-Cron; the dashboard refreshes status and progress while a scan is active.
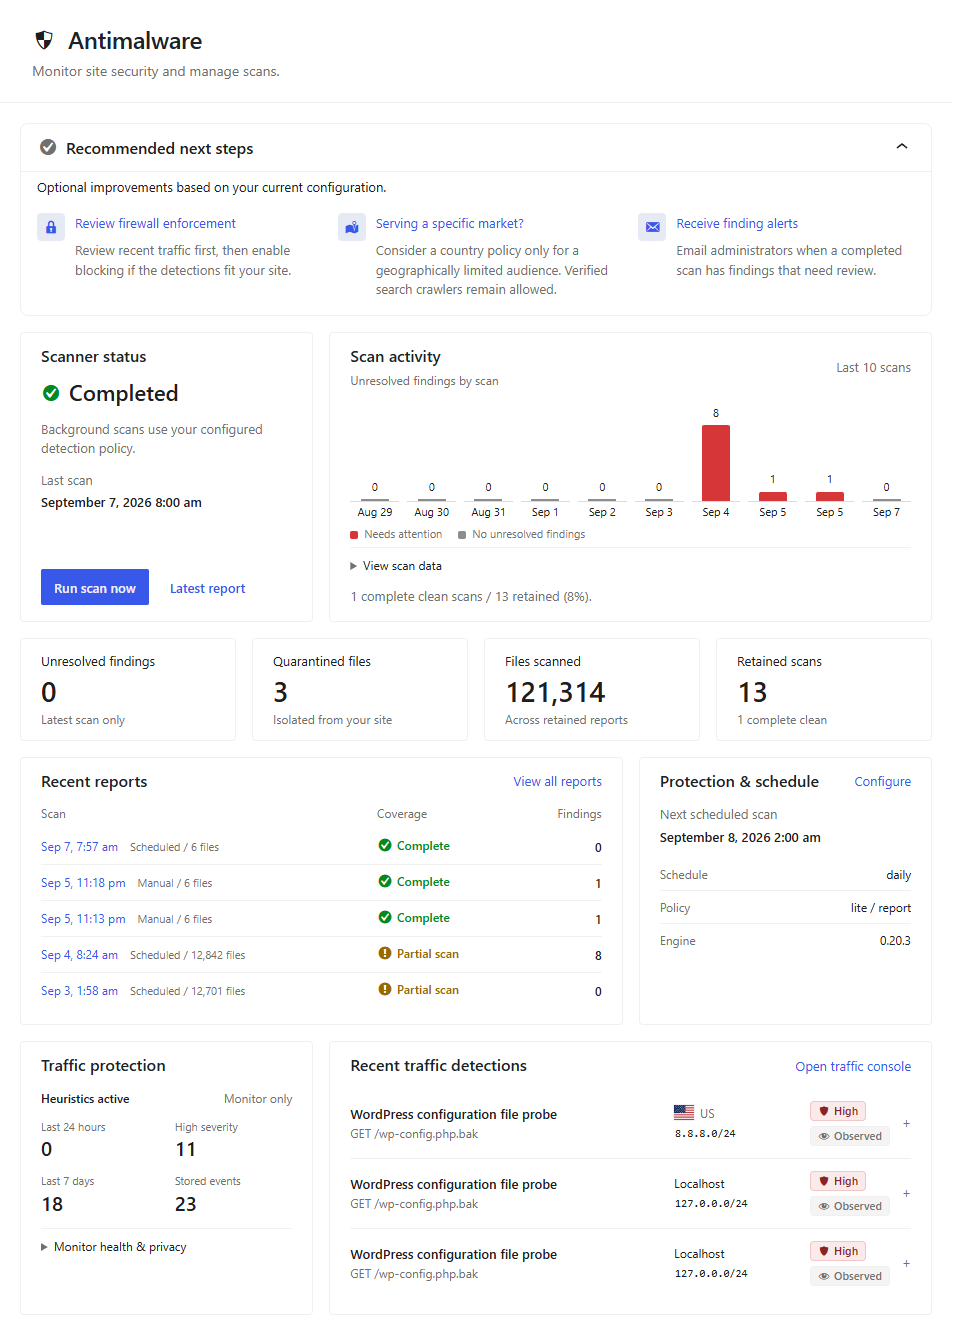
The dashboard summarizes daily manual and scheduled scan activity, detection totals, recent results, and the active scanner policy at a glance.
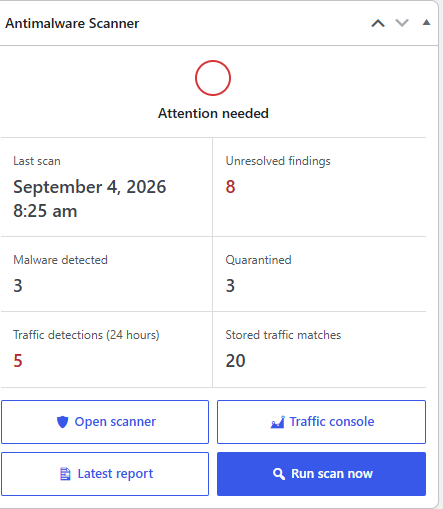
The WordPress home dashboard also includes an Antimalware Scanner widget with scanner health, the latest scan result, stored traffic matches, and shortcuts to the scanner, Traffic console, and scan action.
When the scan completes, select Open report to inspect every detection. Start with report-only mode, which is the default: it records findings without changing files.
Review each finding and make a backup before using clean, delete, or quarantine actions. Automatic file-changing actions require an explicit setting, and every report action checks that the file still matches the scan snapshot.
Configure scans
Open Antimalware > Settings to set the scan target, detection mode, schedule, and storage locations. Scan policy remains visible, while advanced sections can be expanded individually or together. The browser remembers the sections you leave open.
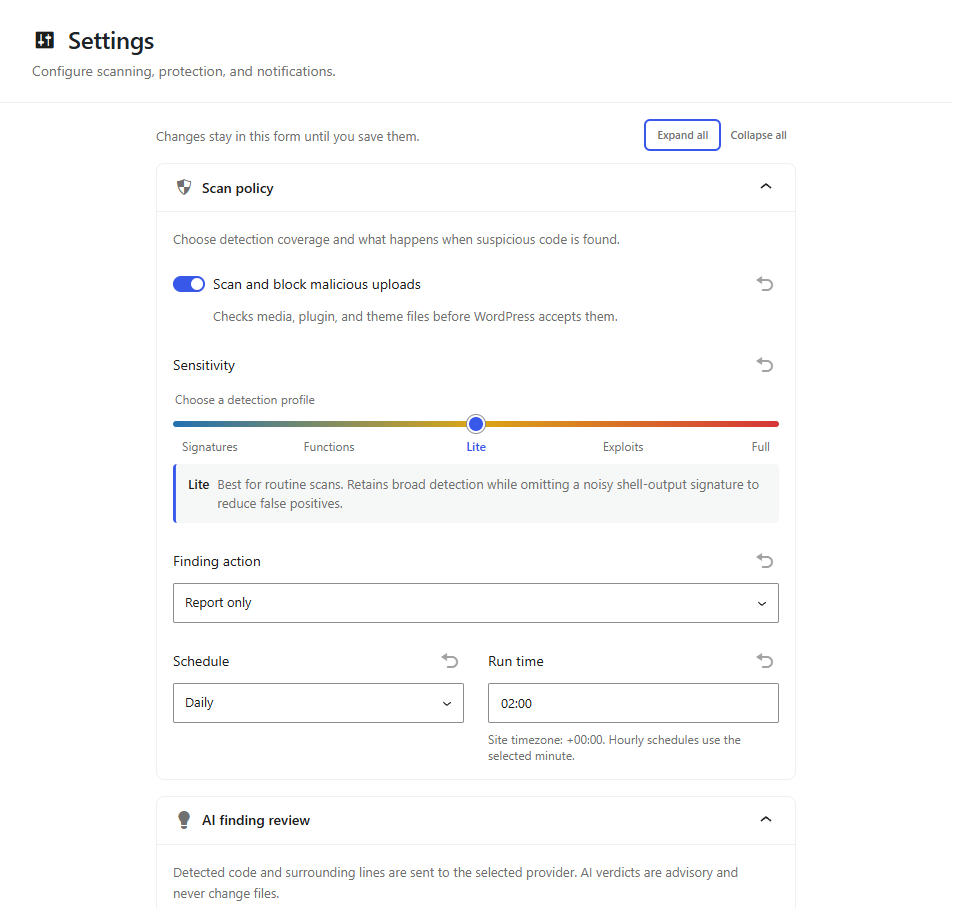
The fully expanded settings view shows every advanced control available for scheduling, email notifications, upload and archive coverage, resumable scans, backups, and diagnostic logging.
- Scan policy controls the scan mode and default response. Use Lite or Signatures only when you need fewer false positives on a typical WordPress installation.
- Schedule can run hourly, twice daily, daily, or weekly. WP-Cron depends on site traffic; use a system scheduler to run
wp cron event run --due-nowfor predictable timing. - Scope and limits lets you define filters and optionally enable bounded ZIP inspection. Archive scanning is disabled for manual and scheduled scans by default because large archives can consume substantial resources.
- Engine and storage manages private report, backup, quarantine, and definition-cache locations. Keep these locations outside the site files that you scan.
Review and remediate findings
Reports list integrity, vulnerability, and reputation checks under Security findings. Code and signature matches appear once under Malware detections, with every detection collapsed initially for easier scanning. Point to or focus a finding to reveal its row actions. Security findings provide Add exception, Reopen, and trusted-file restoration when available; malware detections provide Take action and Report finding when available. Findings that need a new scan or are already handled keep a visible, disabled selection checkbox.
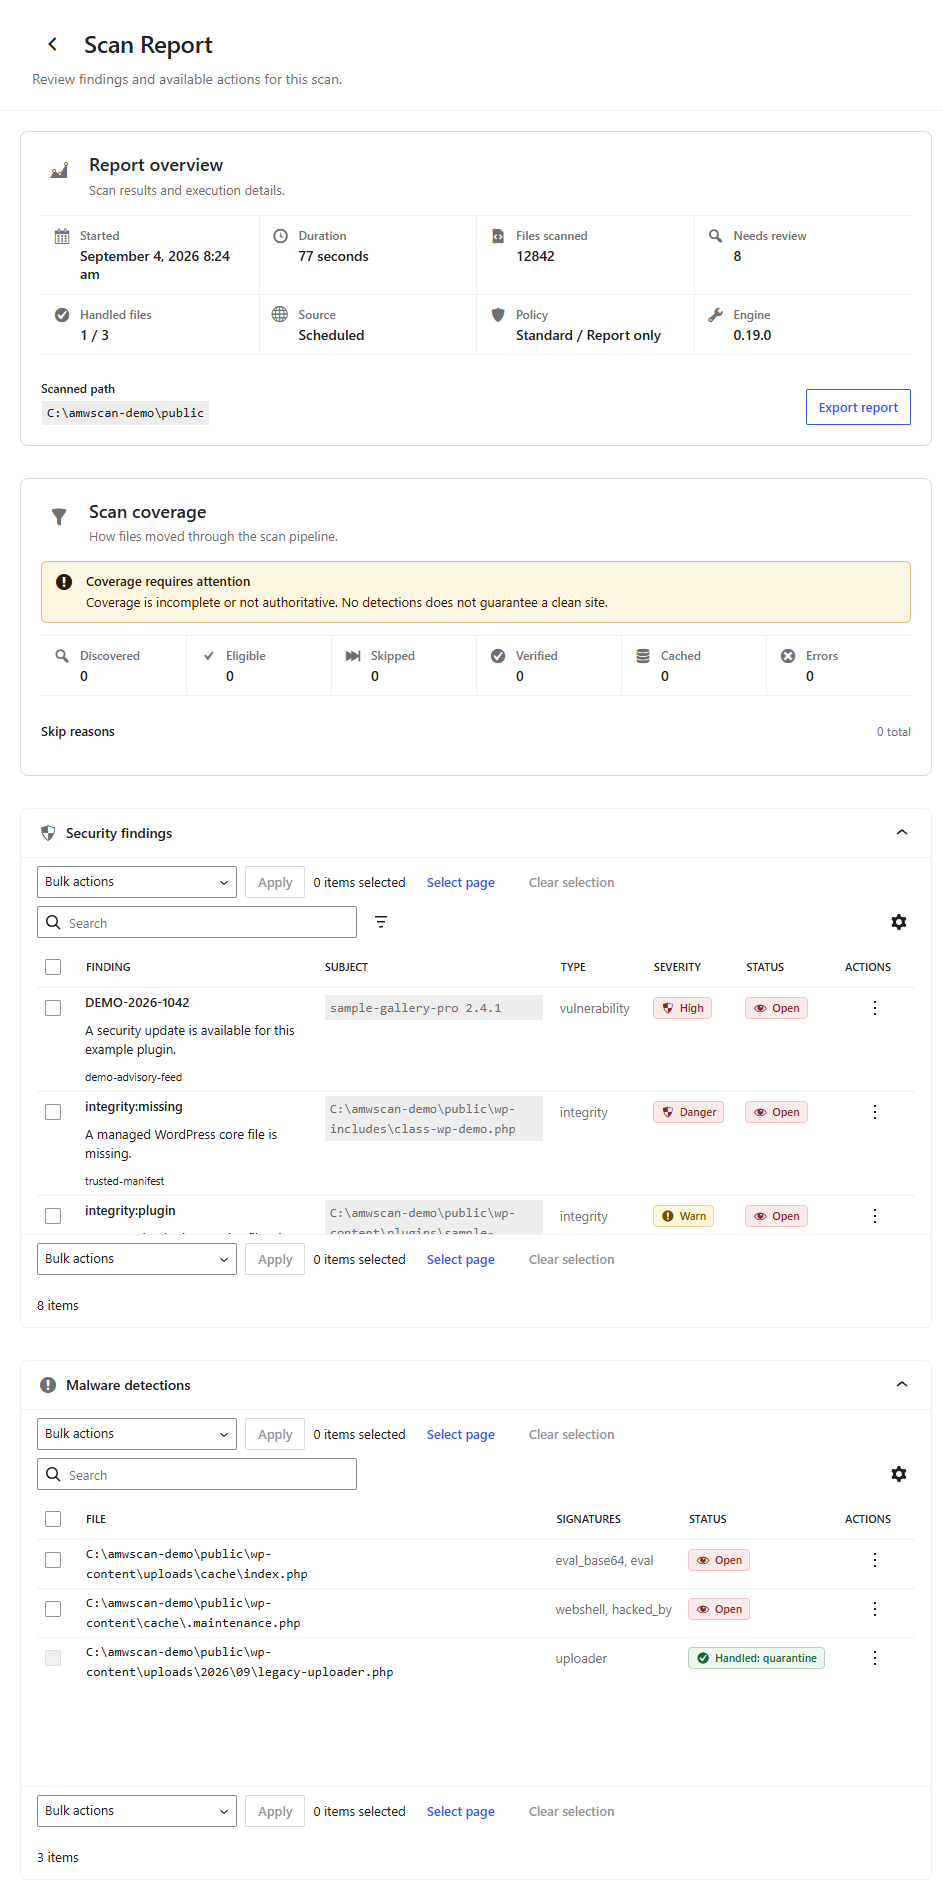
The expanded report view keeps technical evidence and remediation controls together, making each finding easier to verify before acting.
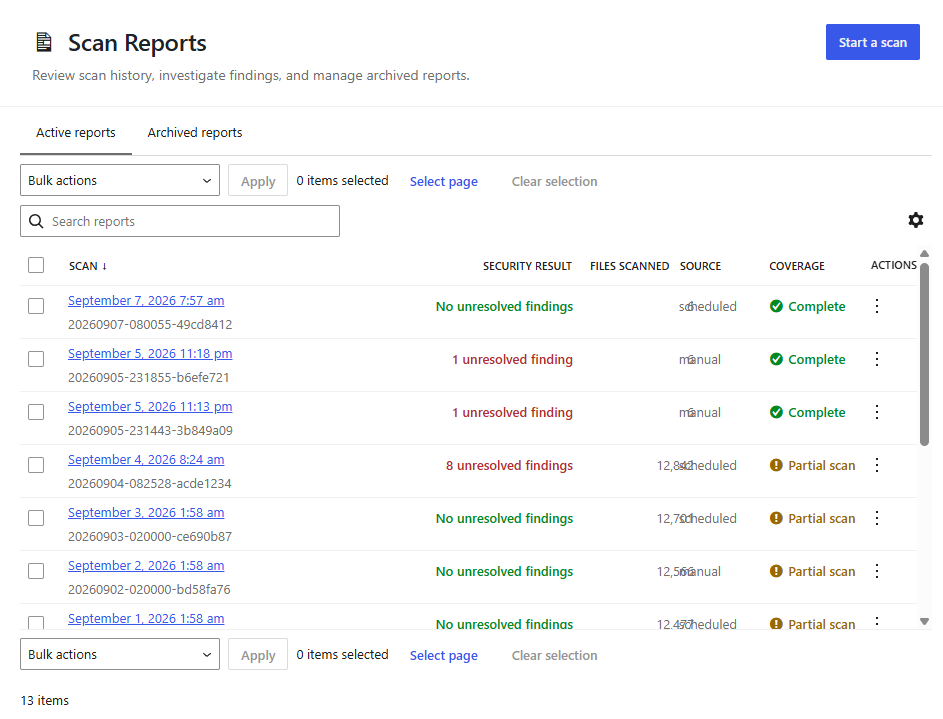
The report history supports row selection and bulk actions and provides an audit trail with scan duration, scanned-file totals, and detected-threat counts. Move older reports to Archived before permanently deleting them; archived reports can be restored at any time until deletion.
Automatic clean, quarantine, and delete actions require confirmation. Lite does not accept browser code edits, and quarantined files can only be permanently removed from Antimalware > Quarantine. Full adds a diff-based browser editor and quarantine restoration. It refuses an action when the file changed after the scan, so run another scan before acting on stale results.
Edit a detected file in the full edition
Select Edit on a malware finding to inspect the scanned file. The editor highlights each affected line and opens at the first match.
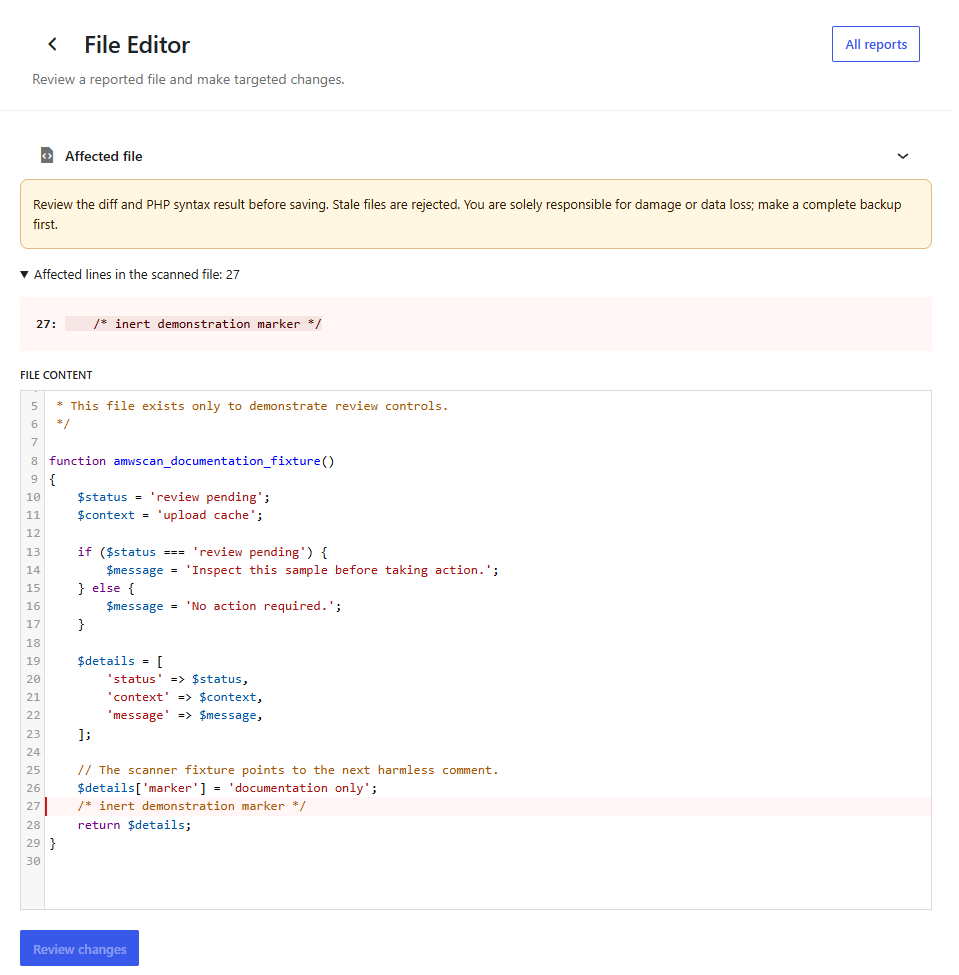
Change the file, then select Review changes. The plugin keeps the original file untouched while you review the edit.
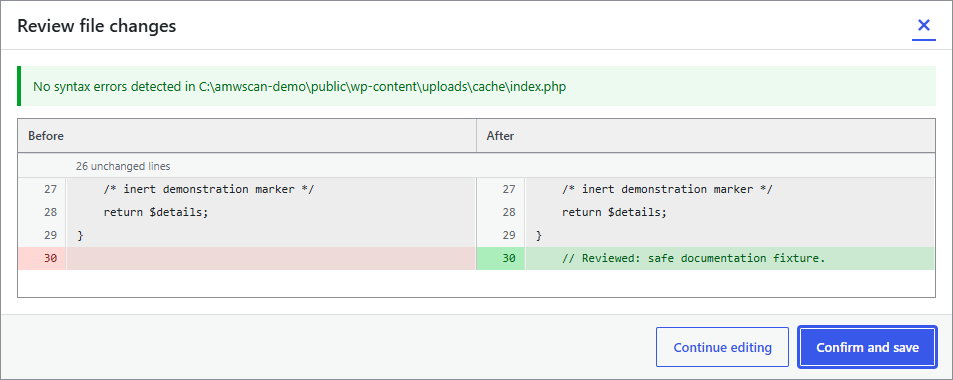
The review dialog compares both versions and checks PHP syntax. Confirm and save stays unavailable when the content has not changed or the syntax check fails. On confirmation, the plugin checks the file against the scan snapshot, saves it through the configured backup policy, and scans it again. A stale file or a remaining detection returns you to the report with its status.
Quarantine and whitelist
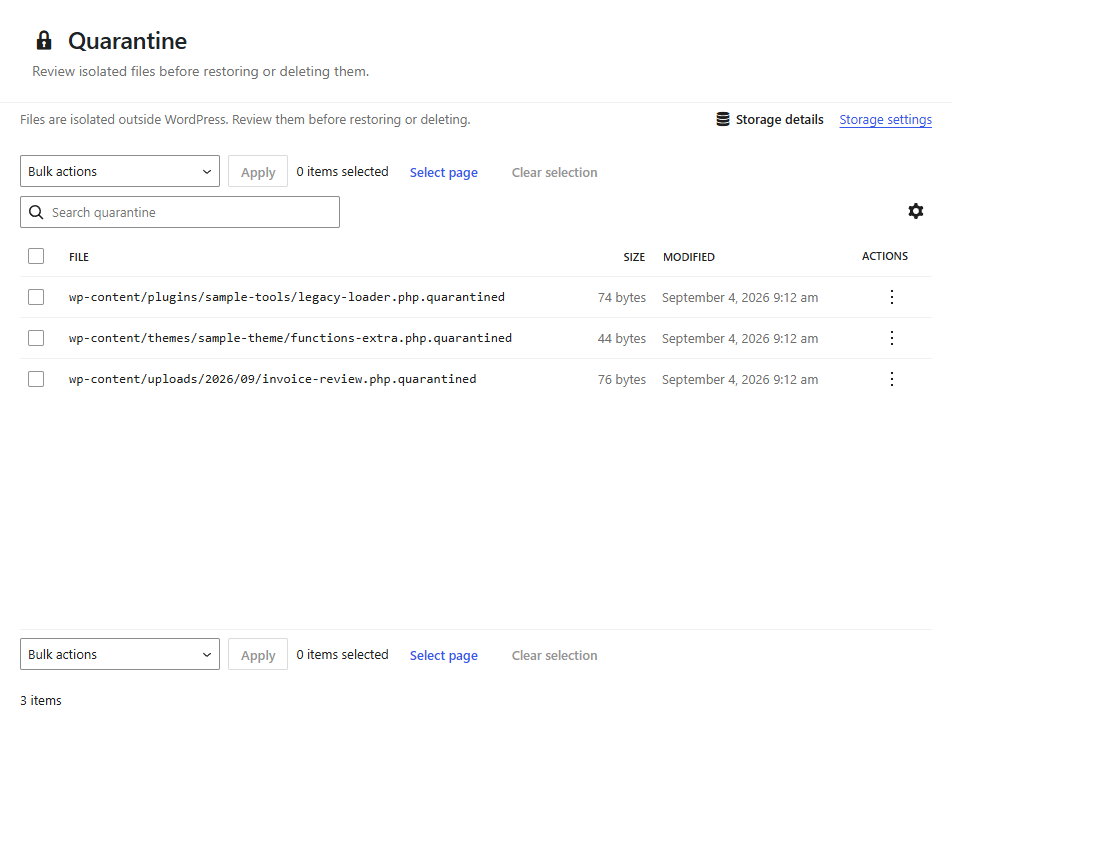
Quarantine safely isolates suspicious files while retaining the metadata needed to review or permanently delete them. The full edition also permits restoration.
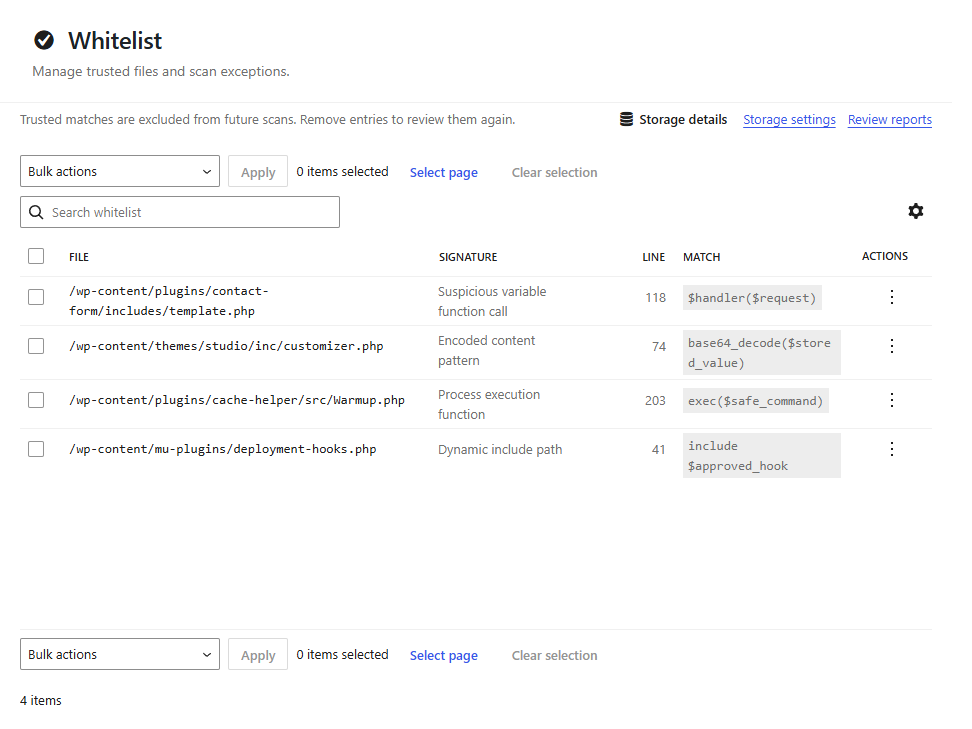
The whitelist lists explicitly trusted findings so reviewed false positives remain suppressed and can be removed when they need to be evaluated again.
Protect WordPress uploads
Scan and block malicious WordPress uploads is enabled by default in Settings > Scan policy. It checks media uploads and plugin or theme ZIPs before WordPress accepts them. Files with detections, or files without authoritative scan coverage, are blocked and recorded in a report for review.
Disable this only when another upload security control is responsible for the same protection.
Monitor suspicious traffic
Enable Request monitoring under Antimalware > Settings > Traffic detection. The passive monitor uses conservative built-in heuristics for traversal, sensitive-file, exploit-path, scanner user-agent, and unexpected-method probes. You can add a curated local plain-text or CSV indicator file for IP addresses, CIDR ranges, domains, URLs, paths, and ua: fragments. Heuristics remain active when no indicator file is configured.
Open Antimalware > Traffic to review seven-day severity and category summaries, filter recent detections, and download a defanged CSV investigation export. The main Antimalware dashboard and WordPress home widget also show recent traffic status.
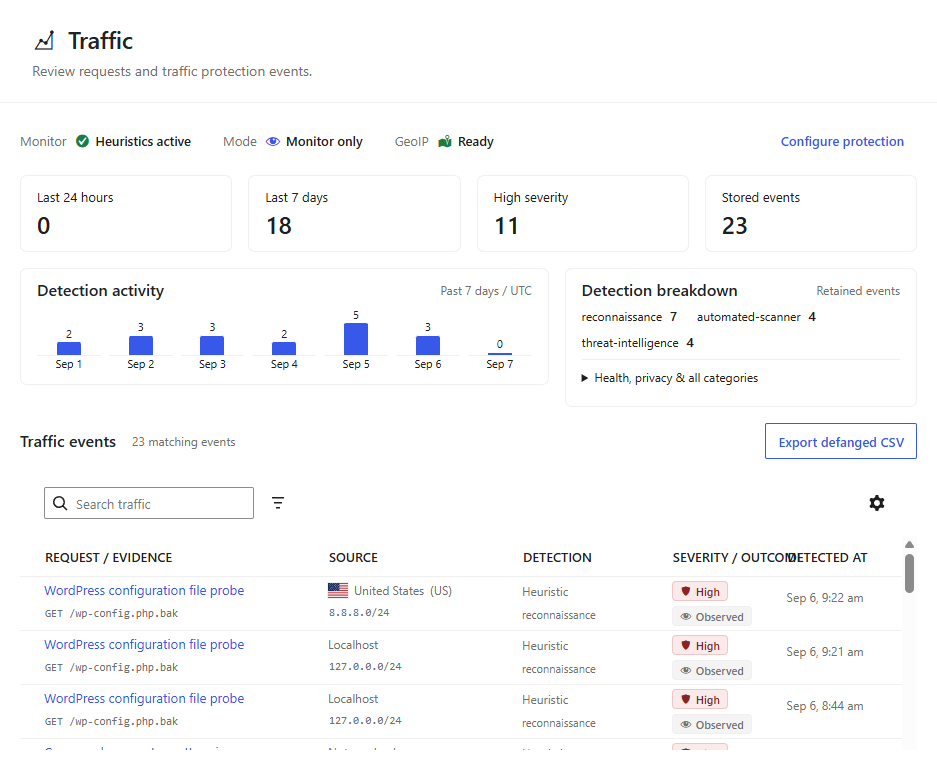
The Traffic console combines monitor health, loaded indicator totals, seven-day trends, and recent request evidence. Use its severity, category, date, and search filters to narrow an investigation before exporting the visible results.
Only requests that reach WordPress can be inspected. Monitoring does not block visitors or inspect DNS, TLS, arbitrary ports, static files, rejected connections, or outbound traffic. Query strings are discarded, addresses are reduced to network prefixes, and duplicate detections are suppressed for five minutes.
Help and diagnostics
The plugin's About page shows installed plugin and engine versions alongside links to documentation, support, contribution guidance, and licensing.
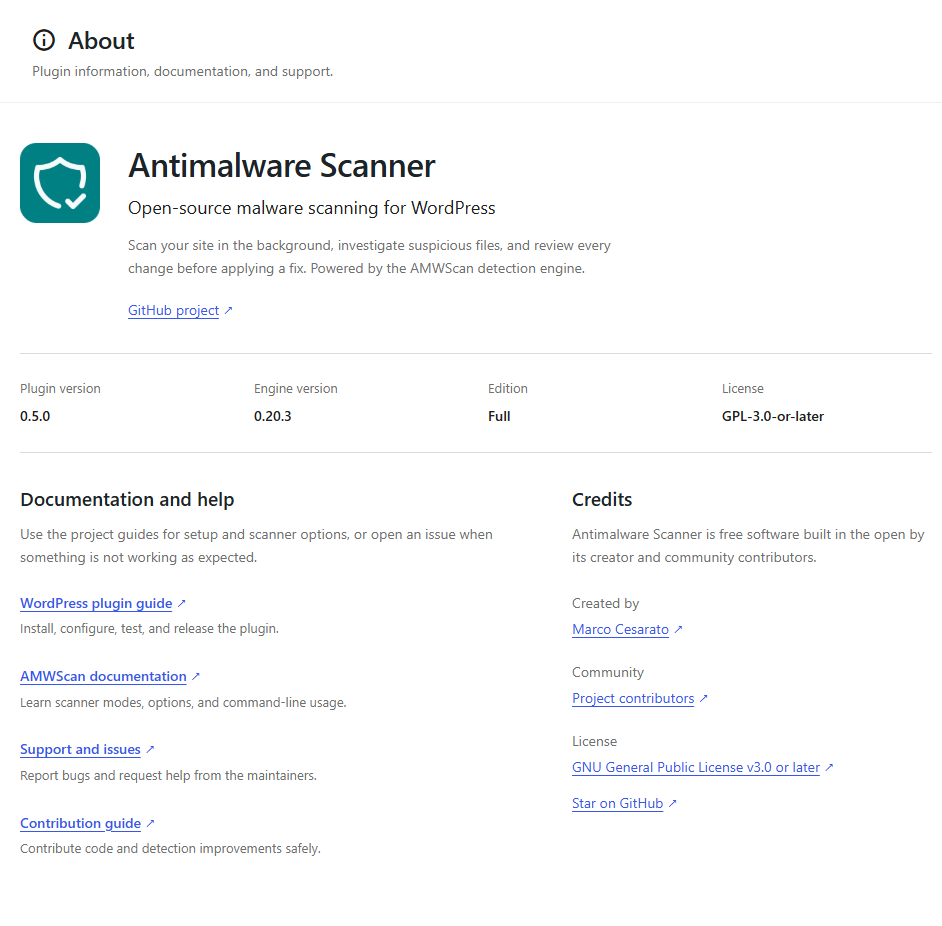
Use these shortcuts to verify the installed version or open the project documentation, issue tracker, contribution guide, and support resources.
For FTP or FTPS scans, configure a credential-free server URL in settings and provide the password through the AMWSCAN_FTP_PASSWORD environment variable; the plugin never saves FTP passwords in WordPress options.
See FTP and FTPS integration for prerequisites, limits, security guidance, and troubleshooting.
For development, test, and release procedures, see the plugin README.